Follow my journey as I return to the classroom after an almost two decade break
Saturday, June 17, 2017
Unfinished: A Masterpiece
I participated in my first ever paint party, and I created an amazing painting. I am not an artist, but by following the instructions of my teacher, I created a beautiful piece. Each member of my class had the same materials and the same instructions. But each picture is unique. Scroll down, and you will see some of the steps I took to create this piece. But first some thoughts...
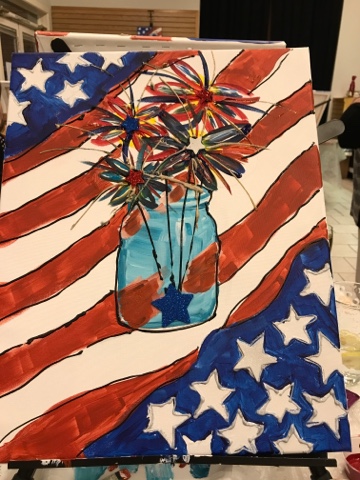
The final product. But it didn't start out this way.
I heard a song on the radio the other day. It reminds me, not only of my faith journey, but of my journey to become Half a Julie. It also made me think of the painting I had done. There were times when my picture did not look like it would ever be a masterpiece. But I trusted the one who was guiding me, and I kept going. If I had given up in the middle of the class, the painting would have been incomplete.
Here are some of the words (followed by a video with the lyrics).
No, my God's not done
Making me a masterpiece
He's still working on me
He started something good and I'm gonna believe it
He started something good and He's gonna complete it
So I'll celebrate the truth
His work in me ain't through
I'm just unfinished
"Unfinished" by Mandisa
The song is based on Phillipians 1:6.
Another verse I thought of was Ephesians 2:10. Last week my pastor spoke about this verse, and how we are God's masterpiece. He had an empty picture frame, and he asked for volunteers to see themselves as God sees them. I stood and held the empty frame and declared, "I am His masterpiece."
1. Start with a teacher who knows how to create a masterpiece.
My teacher (who started painting at 47--my age!)
2. Start with a blank canvas.
My friends and I all started with the same blank page.
3. Divide the canvas into manageable sections.
We "cut off" the corners first.
4. Begin adding details.
After drawing the stars, we outlined them in paint.
Then we filled in the sections around the stars.
5. Don't be afraid to start over.
I drew and erased the jar several times until I was happy with the design.
6. Use guide lines and boundaries.
I added the outlines for the bouquet and the red stripes.
7. Sometimes there will be places you can't see the line, but stay on the path.
Our teacher encouraged us to follow a strip all the way across, rather than complete the left side
and then go to the right side because it is too easy to get mixed up on the stripes.
8. You are not limited by the colors you start with--mix things up a bit!
For the jar, we mixed turquoise and white and used texturing. We used the edge of the brush to outline the jar.
9. Sometimes the instructions will be unexpected and won't make sense. Just obey and wait.
When it was time to create the flowers we started with yellow circles.
Next we began outlining the flowers.
10. Sometimes the colors blend more than you expected, but it's okay.
Yellow + Blue = green. I didn't like it. But I kept going.
11. Fill in gaps.
We added extra flowers where there were holes.
12. Contrast helps with perspective.
We outlined stripes and the jar in black--and the stars in silver glitter.
14. Add extra details.
I added glittery stars and gold sparklers to the flowers.
15. Learn from people around you.
I didn't like how dark the flowers were, and I noticed a neighbor adding silver glitter to the flowers.
It was just the lightener I needed.
16. Realize that your masterpiece will be different than everyone else's, but it will be beautiful!
My co-workers and I with our unique masterpieces. All similar, but different. All beautiful!
17. Display your masterpiece!
I moved things around on my patriotic wall at work to fit the new painting in.
No comments:
Post a Comment
Thanks for your support on this journey. Please be nice (to me and to other commenters).


No comments:
Post a Comment
Thanks for your support on this journey. Please be nice (to me and to other commenters).